Stripe
Get the api key
After you have created your account for Stripe (opens in a new tab), you will need to get the API key. You can do this by going to the API page (opens in a new tab) in the dashboard. Here you will find the Secret key and the Publishable key. You will need the Secret key for the integration to work.
Add environment variables
To use the Stripe integration, you need to define the following environment variables to your .env.local as well as your production environment:
STRIPE_SECRET_KEY="" # Your Stripe secret key
STRIPE_WEBHOOK_SECRET="" # The secret key of the webhook you created (see below)
Create products
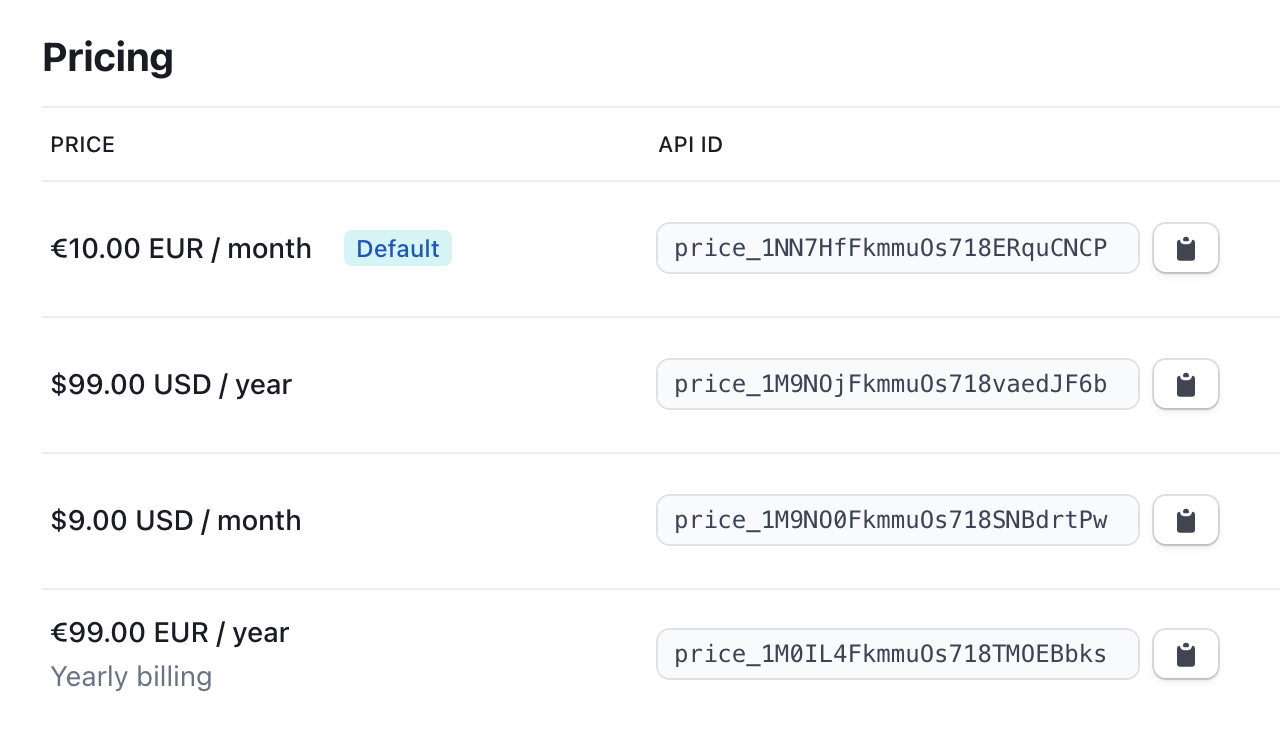
For your users to choose from the available subscription plans, you need to create those Products first on the Products page (opens in a new tab). You can create as many products as you want, but you will need to create at least one product for the integration to work.
Create one product per plan you want to offer. You can add multiple prices within this product to offer multiple currencies or different billing intervals.
Create a webhook
To sync the current subscription status and other information to your database, you need to set up a webhook.
The webhook code comes ready to use with supastarter, you just have to create the webhook in the Stripe dashboard and insert the URL for your project.
To configure a new webhook, go to the Webhooks page (opens in a new tab) in the Stripe settings and click the Add endpoint button.
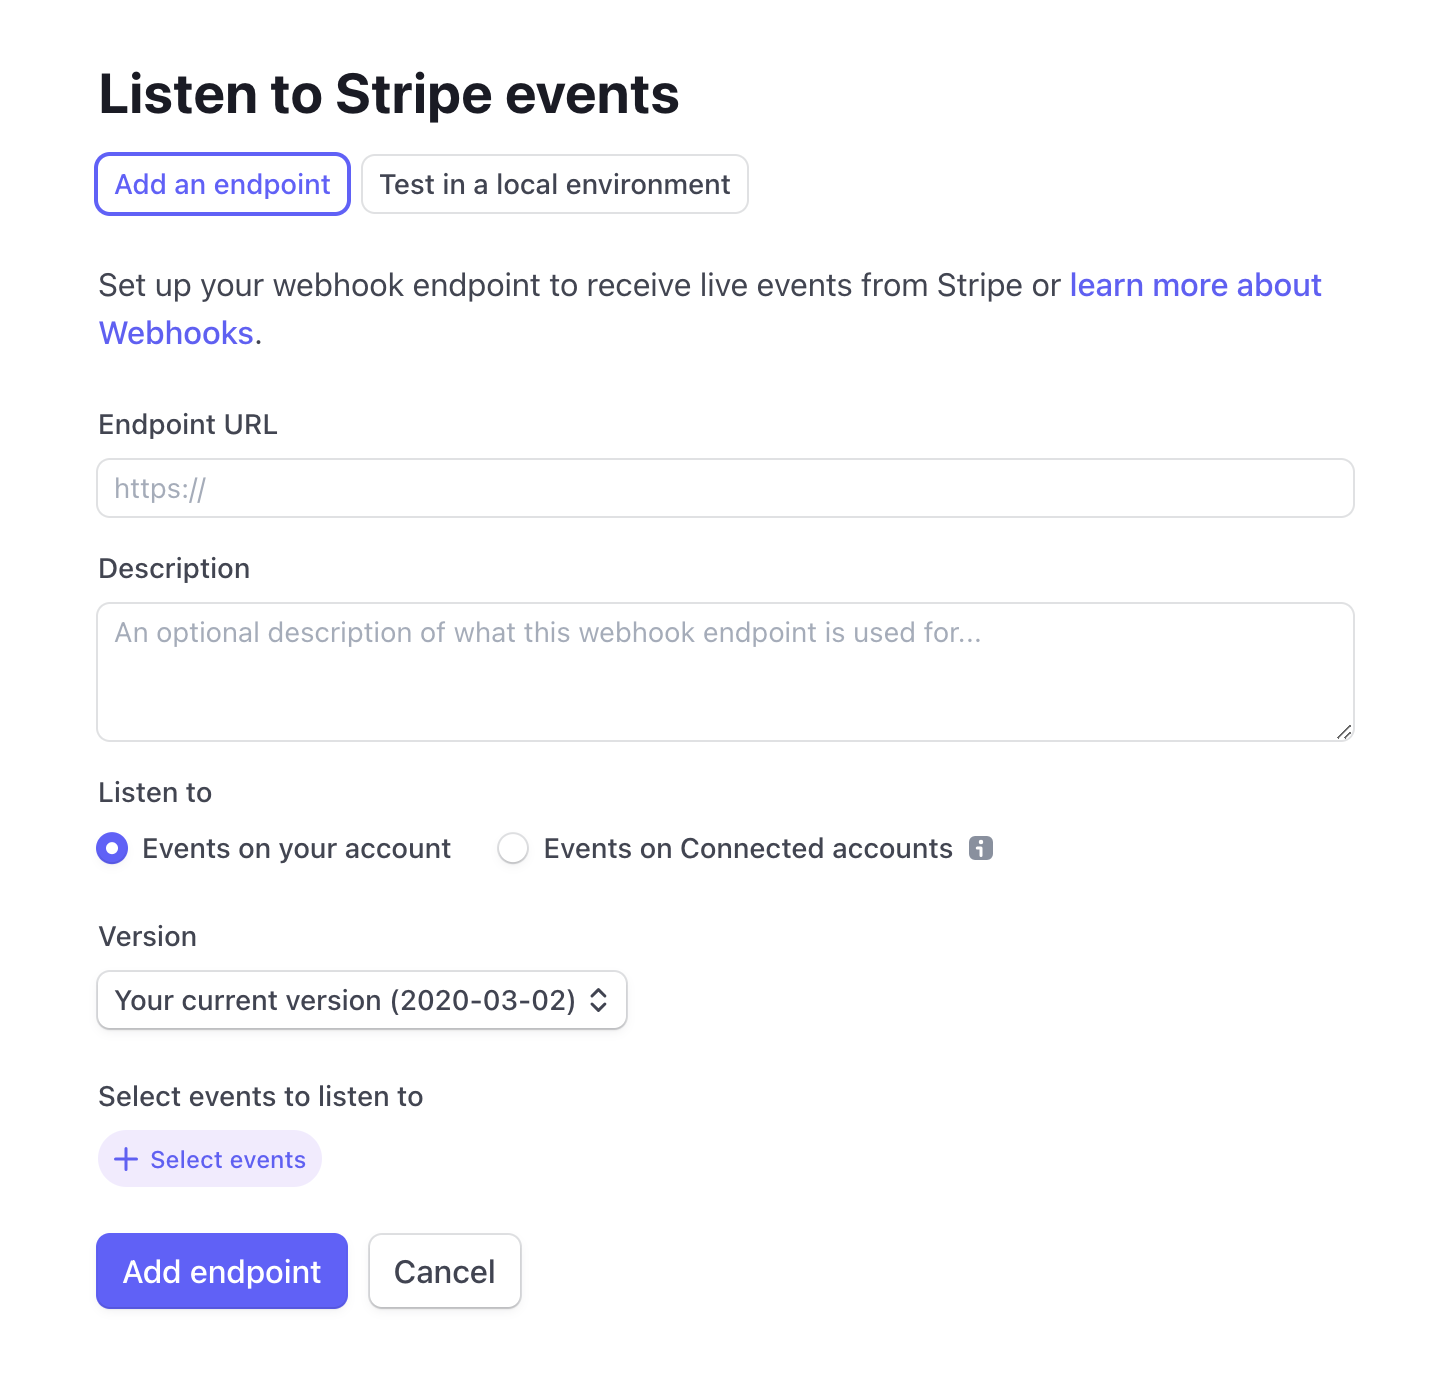
Select the following events:
- customer.subscription.created
- customer.subscription.updated
- customer.subscription.deleted
To get the URL for the webhook, you can either use a local development URL or the URL of your deployed app:
Local development
If you want to test the webhook locally, you can use ngrok (opens in a new tab) to create a tunnel to your local machine. Ngrok will then give you a URL that you can use to test the webhook locally.
To do so, install ngrok and run it with the following command (while your supastarter development server is running):
ngrok http 3000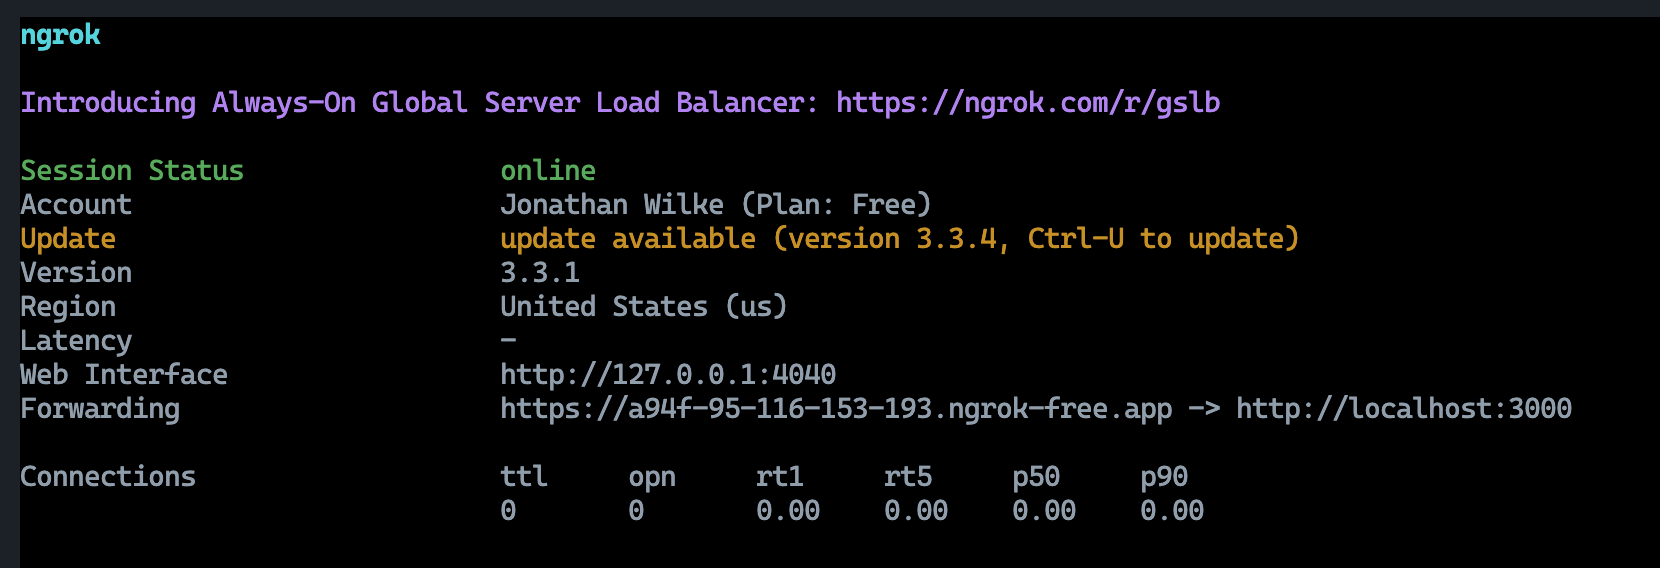
This will give you a URL (see the Forwarding output) that you can use to create a webhook in Stripe. Just use that url and add /api/webhooks/stripe to it.
Production / preview deployment
When you have already deployed a version of your project, you can use the actual URL to create the webhook with. This will be necessary for a production version your app later anyway.
Make sure you have a deployed version that has the STRIPE_WEBHOOK_SECRET environment variable set.
Then you can use the URL of your deployed app and add /api/webhooks/stripe to it.
Example URL: https://your-app.com/api/webhooks/stripe
Set currency for locales in your app
Lastly you need to configure the currency that should be used for each locale in your app.
You can do this by setting the numberFormats[<lang>].currency.style variables in the apps/web/i18n.config.ts file.
export default defineI18nConfig(() => ({
  // ...
  numberFormats: {
    en: {
      currency: {
        style: 'currency',
        currency: 'USD',
        notation: 'standard',
      },
      // ...
    },

    // 'de' and other languages...
  },
}));